Upload to WorkflowHub
Last updated on 2025-03-28 | Edit this page
Overview
Questions
- Why should I use WorkflowHub?
- How does WorkflowHub compare with the Snakemake Workflow Catalogue?
Objectives
- Create an account on the WorkflowHub dev server
- Submit our workflow to the system via the web interface
- Add tags and documentation to our workflow
- Review how our workflow will appear on the website
About WorkflowHub.eu
WorkflowHub is a FAIR registry for describing, sharing and publishing scientific computational workflows. The registry is sponsored by multiple EU-wide projects, notably the European RI Cluster EOSC-Life, and the European Research Infrastructure ELIXIR.
While the project is EU-funded, and serves the needs of EU research projects, all users are welcome. You do not have to be in Europe, or part of any European project team, to make use of it.
From their own guide, these are the reasons why any research project (or team, or facility) producing workflows should register them in WorkflowHub:
- To give visibility to the workflows used by a project
- To share workflows across a project, within project networks and externally
- To credit and cite the people making workflows, and the networks to which they belong
- To track the new versions of workflows as they are produced, and
- To retain workflows for post-project use by a project’s members, their networks, and the broader scientific community
As an individual user, the ability to search for workflows directly on the site or to obtain a workflow cited in a paper can be immediately useful. For the purposes of this workshop we will submit our own sample workflow to show how that side of things works. We’ll submit to the development version of the site, so as not to fill up the main website with test workflows.
Registering on the WorkflowHub test server
You will need an account on the dev server to upload your workflow. Even if you previously registered on WorkflowHub, make a new account on the development server as the accounts are completely separate.
- Visit https://dev.workflowhub.eu
- Click the Log in button (not the Register button)
- Log in with GitHub to create a new account
- On the next screen, enter your name but leave the other details blank
- Verify your account using the e-mail token
If for some reason you are unable to use your GitHub login then it is possible to register a standalone account with your e-mail address. You will need to verify your e-mail before the account can be active.
If for any reason some people are unable to create an account, learners may log into the account owned by the course tutor. Since this is a test server, this is OK.
Joining a team
In order to use the website, you must be a member of at least one team. One option would be to make a personal team. We’ll not do this today as it requires an administrator approval from the WorkflowHub maintainers and we don’t want to burden them with requests or have to wait for all the approvals. Instead, all learners can join a team owned by the course tutor. This team name is “Submission Tutorial”.
- Click on the “Join a Team” option you see after successfully logging in.
- Find the team as named above and request access.
- Choose any existing organisation you like, be it your real organisation or not.
- You can fill in the other things or leave them blank.
- The tutor will approve all the requests via their own account.
Submitting our test workflow
Once you are enrolled in the team, you may Contribute your workflow.
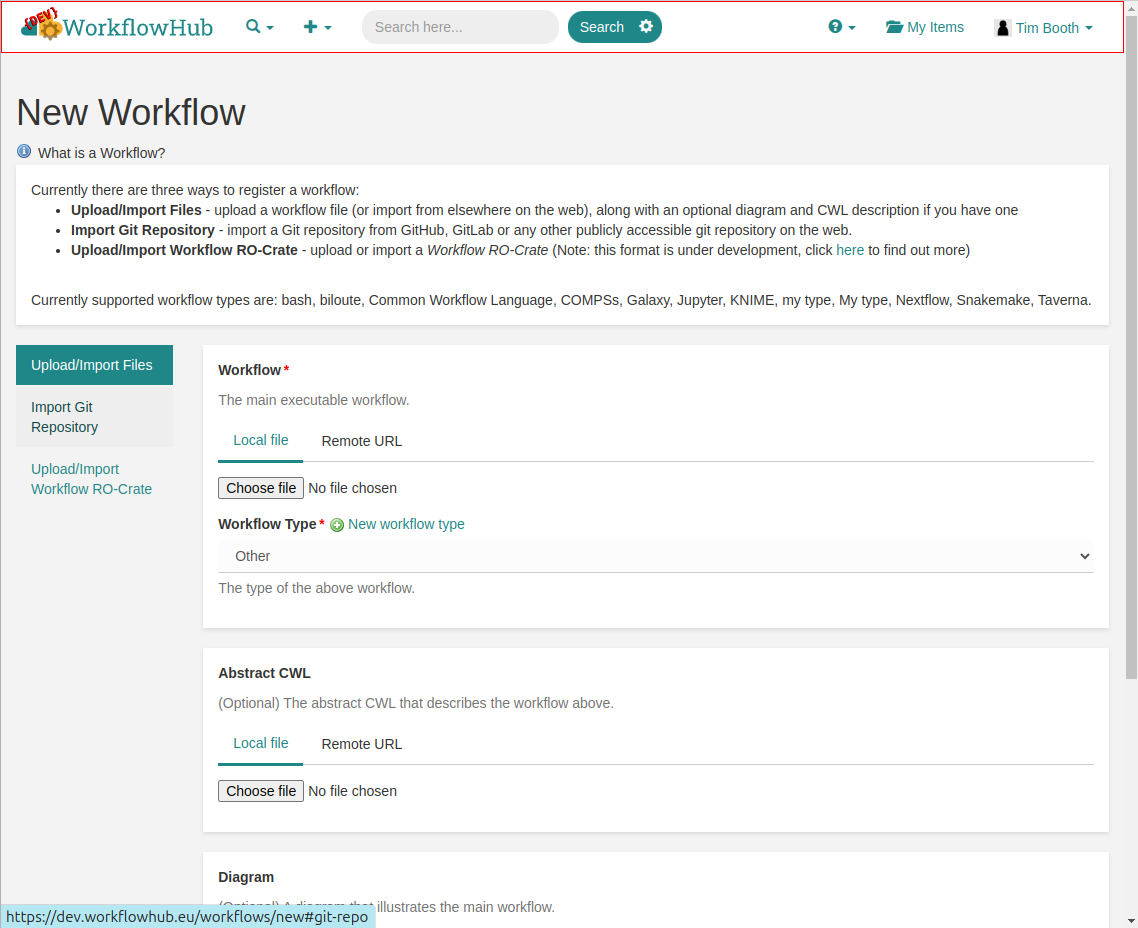
As we have now stored our workflow in GitHub, and the file layout matches the recommendations, the easiest option is to use the Import Git Repository method, rather than uploading the files directly from the local machine.
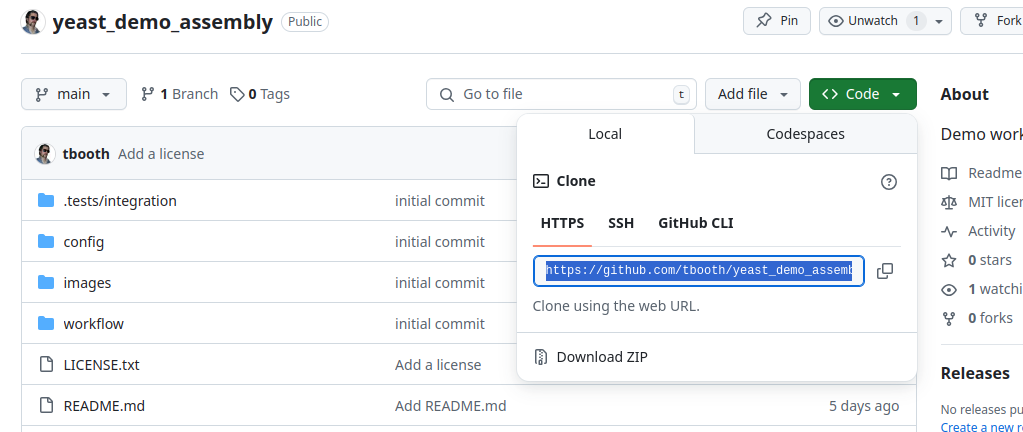
You will be prompted for the “URL of the git repository”. For
repositories on GitHub this is simply the regular URL you would use in
your browser, with “.git” on the end. You can also find this by clicking
the “Code” button on the project page within GitHub. It will start with
https://....
Once you enter the URL and press Register, you should see an option to import the main branch, so go ahead.
Now you need to confirm that your main workflow is
workflow/Snakefile and is of type Snakemake. Also
the diagram is under images/rulegraph.svg.
Ignore the Abstract CWL - we do not have this.
On the next screen, you will see that the README.md has
been loaded into the Description box. You can move the
header text from here into the Title box above.
Ensure the workflow is associated with the Submission Tutorial team.
You should see that the License is correctly detected as
MIT License, and you should also see that information from your
CITATION.cff file has been picked up.
You could add extra items at this point but we have all we need for the initial upload. Click the Register button one more time, and confirm you are happy with public visibility. You should now see your workflow on the site. You can bookmark the URL for your workflow and share it directly, or you could mint a DOI for the workflow if you plan to publish this version.
Note: DOI creation may not work correctly on the dev.workflowhub.eu site.
The Snakemake Workflow Catalogue
This site, made by the Snakemake developers, can be found at:
https://snakemake.github.io/snakemake-workflow-catalog/
This is another resource where you may find and share Snakemake workflows. It works very differently to WorkflowHub, in that.
- This resource is specific to Snakemake workflows
- Workflows are not submitted directly to the catalog, but are discovered and listed from GitHub
- All the listed workflows are public, as they must be public projects on GitHub to begin with
- There is no option to upload a workflow diagram or any extra documentation files
- There is no option to mint a DOI for publication
- You can add extra information to the catalog by adding a
.snakemake-workflow-catalog.ymlfile in your Git repository - You automatically update your workflow by making releases on GitHub
There is no reason why your workflow should not be in both places.